Configuring a Cisco switch is a foundational skill in networking, essential for both beginners and seasoned IT professionals. Cisco Packet Tracer provides a user-friendly environment in which to practice these configurations without needing physical equipment. This guide on how to configure a basic Cisco switch on Cisco Packet Tracer walks you through the basic steps for setting up a Cisco switch, including hostname setup, IP configuration, and secure access management. Whether you’re preparing for exams, setting up a lab, or just exploring network management, this guide will help you get hands-on experience with essential Cisco switch configurations.
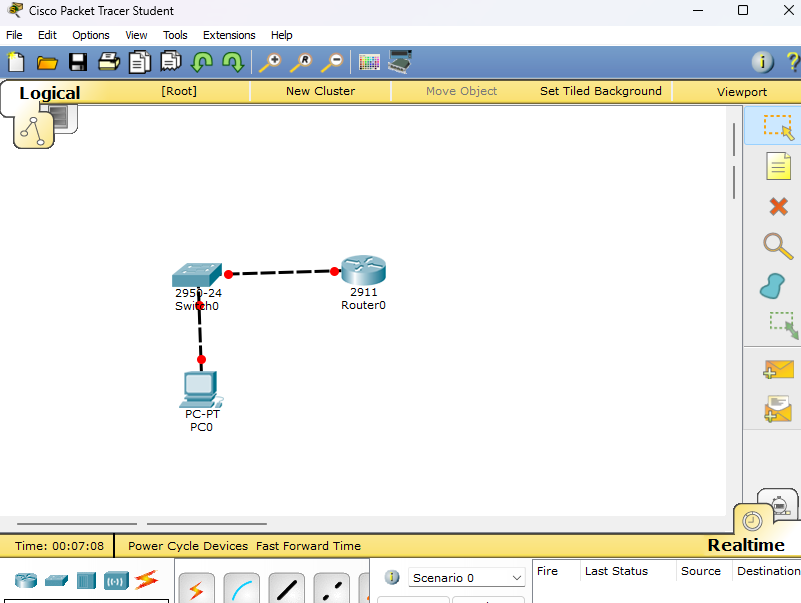
1. Open Cisco Packet Tracer
- Open Cisco Packet Tracer and create a new project to configure a basic Cisco switch.
2. Add a Cisco Switch
- In the left-hand menu, select Switches.
- Drag a Cisco 2911 Switch (or another type if needed) into the workspace on Cisco Packet Tracer.
3. Connect Devices (Optional)
- Connect the switch to other devices like PCs using Copper Straight-Through cables.
4. Access the Switch CLI
- Click on the switch to open it, then go to the CLI (Command Line Interface) tab.
5. Enter Privileged EXEC Mode
- Type
enableto enter privileged EXEC mode. - The prompt changes from
Switch>toSwitch#, a key step in how to configure a basic Cisco switch.
6. Enter Global Configuration Mode
- Type
configure terminalorconf t. - The prompt changes to
Switch(config)#.
7. Basic Configuration
a. Set a Hostname
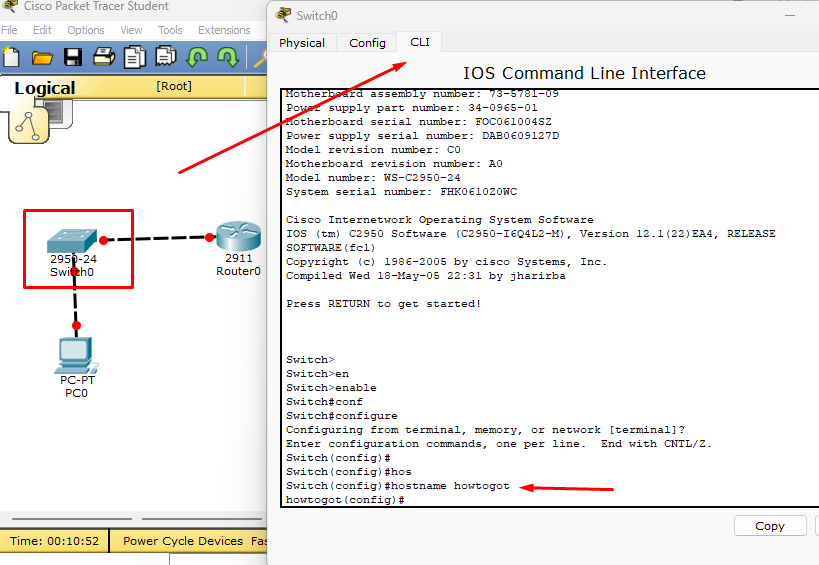
hostname howtogotReplace how to get started with the desired name.
b. Configure Management Interface (VLAN 1)
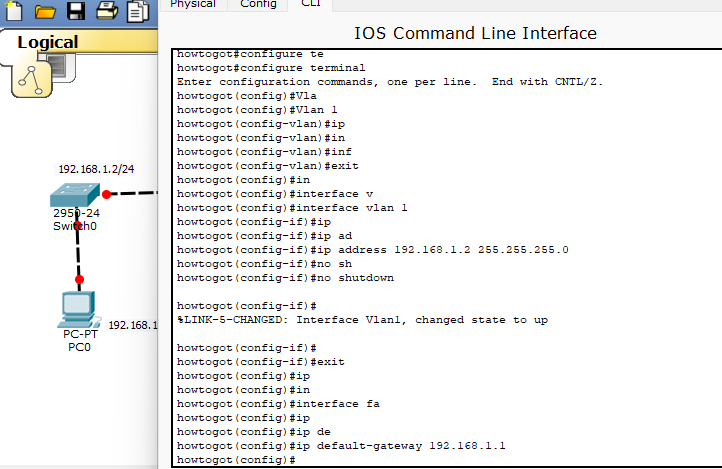
Assign an IP address to VLAN 1 for management access on Cisco Packet Tracer.
   interface vlan 1
   ip address 192.168.1.2 255.255.255.0
   no shutdown
Replace 192.168.1.2 and 255.255.255.0 with the appropriate IP address and subnet mask for your network.
c. Set Default Gateway (for remote management)
ip default-gateway 192.168.1.1Replace 192.168.1.1 with the IP address of your network’s default gateway.
d. Configure Passwords (Optional)
To set up passwords for security on how to configure a Cisco switch:
- Console Password:
line console 0 password YourPassword login - Enable Password:
shell enable secret YourSecretPassword

e. Configure SSH for Remote Access (Optional)
To configure SSH access, first create a domain name and crypto key for the switch configuration.
   ip domain-name yourdomain.com
crypto key generate rsa- When prompted, specify key modulus size (usually 1024 or 2048). Then configure user authentication.
   username admin secret YourPassword
   line vty 0 4
   login local
   transport input ssh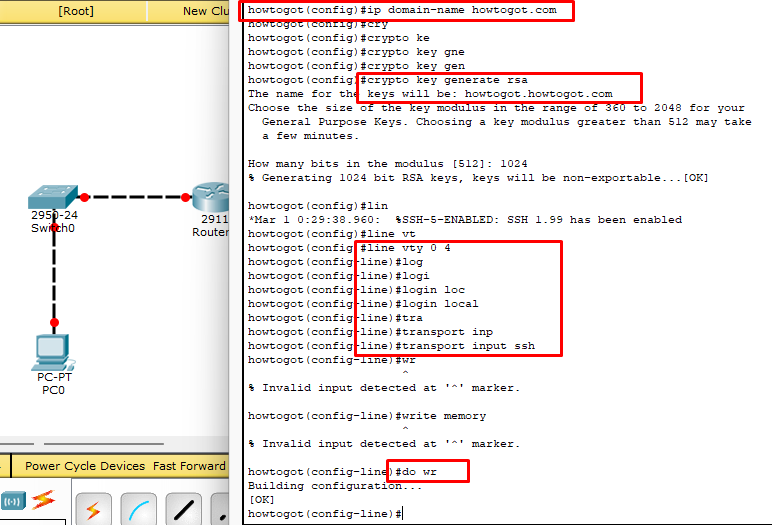
8. Save Configuration
- Type
endto exit configuration mode, then:
write memoryThis saves the configuration to startup configuration, so it persists after reboot.
9. Verify Configuration
- Use
show running-configto check the current configuration. - Test connectivity by pinging from connected devices or using SSH, as you configure switch settings in Cisco Packet Tracer.
With these steps, you’ve completed how to configure a basic Cisco switch in Cisco Packet Tracer. This configuration enables basic management and access features, ideal for lab practice or network simulations.
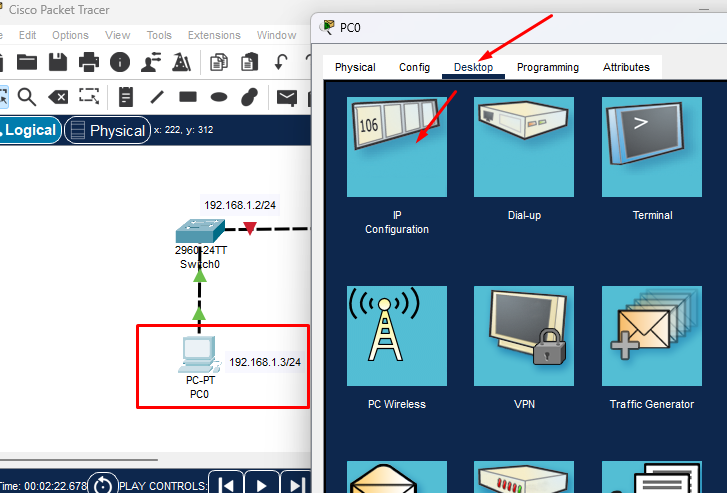
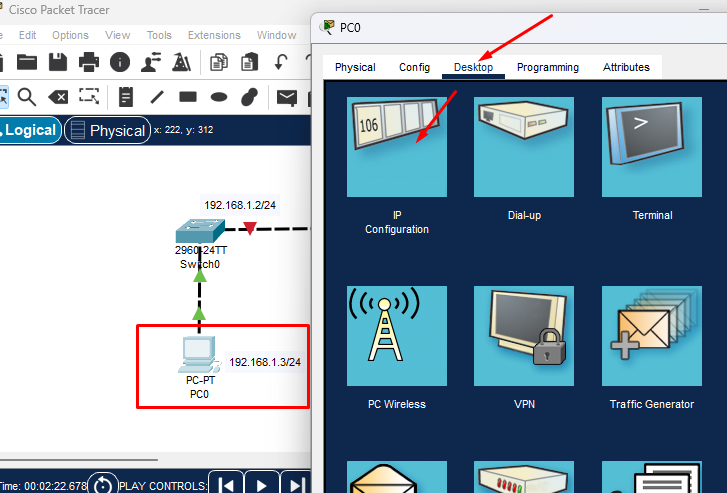
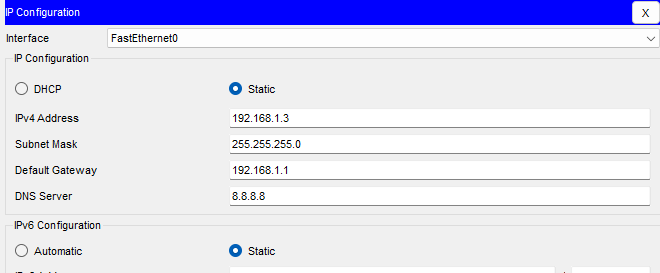
If you want to follow the steps with this planned test, can continue as below you have assigned an IP address on the Router interface for the default gateways 192.1681.1/24 and on PC 192.168.1.3/24
- Turn on Switch ports Fa/01 and Fa/02

2. Add default Gateways on the Router
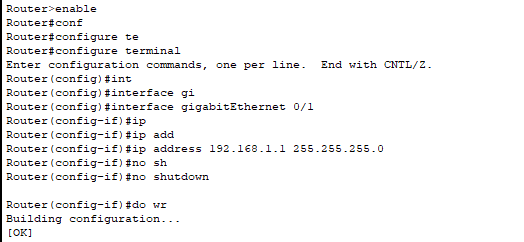
3. Add IP address to PC 192.168.1.3/24
With these simple steps, you’re well on your way to mastering the basics of configuring a Cisco switch in Cisco Packet Tracer. From initial access to secure management settings, you now have a functional switch ready for practical application and testing. This setup provides a strong foundation for more complex network topologies and real-world network management scenarios. Keep exploring and building on this knowledge to deepen your skills in Cisco networking! drop your comments if you any problem.

