Creating VLANs on the UniFi Network Controller can help you segment your network for improved security and better traffic management. Here’s a step-by-step guide to setting up a VLAN on the UniFi Network Controller:
Step 1: Access the UniFi Network Controller
- Open your browser and log in to your UniFi Network Controller. This is the first step in learning how to create VLAN on the Unifi Network Controller.
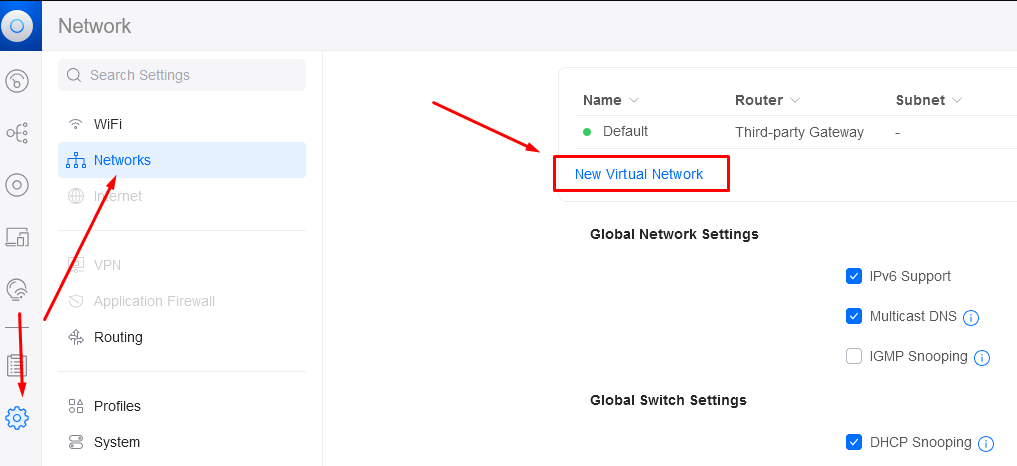
- Go to the Settings tab in the left sidebar.
Step 2: Create a New Network
- In Settings, select Networks to start the process of how to create VLAN on the Unifi Network Controller.
- Click on Create New Network.

Step 3: Create VLAN Settings
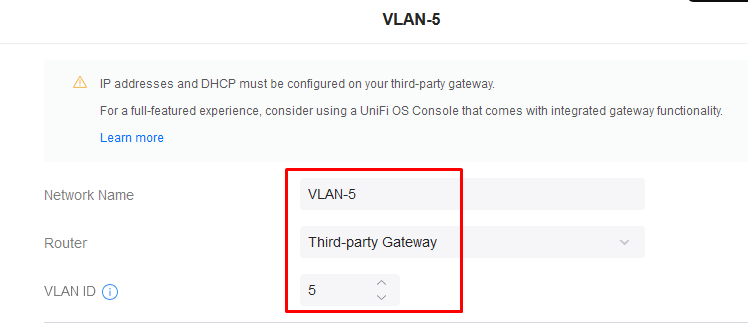
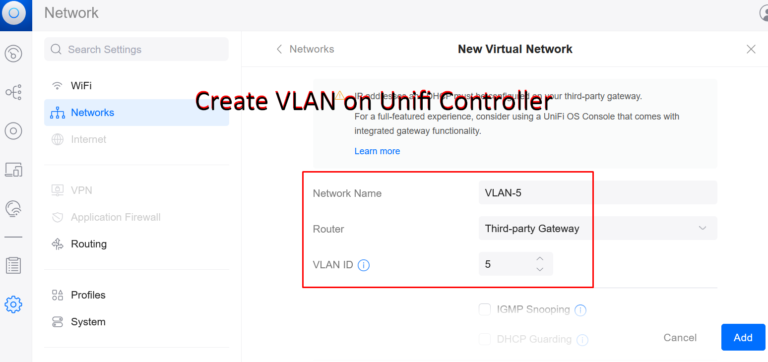
- Enter a Name for the new network (e.g., “VLAN-5”).
- Choose the Network Purpose. For VLANs, select Corporate if it’s a private VLAN or Guest for a guest network. Understanding these choices is key when learning how to create VLAN on the Unifi Network Controller.
- In the VLAN field, enter a VLAN ID (e.g., “5”). This number should match the VLAN ID configured on other network devices if you are using VLANs across your network.


Step 4: Add VLAN to WiFi SSID
After you create a VLAN name and add the VLAN ID already as from step 3. Then you need to add the Wifi SSID access network with the VLAN-5. Click Apply Changes to save the new network configuration. Follow these steps on how to create VLAN on the Unifi Network Controller.

Now you are done, you can test with your phone by connect wifi and checking the IP Address in the network to make sure to get the IP Address as your Vlan or not. Ensure you understand how to create VLAN on the Unifi Network Controller by reviewing these steps.
After completing these steps, your new VLAN should be up and running, and devices on this VLAN will be segmented from the rest of the network according to the VLAN configuration. This is how to create VLAN on the Unifi Network Controller successfully.

